| MY OTHER SOFTWARES: |
| |
If you are interested go this link :
"Software (English)"
or
"Logiciel (Français)".
|
| DOWNLOAD/INSTALL: |
| |
Just Install the program from this link : "Image To WEB".
Installation Procedure :
As this program is not "Microsoft Certified", and because it will add some keys in the "Registry" the installation need some particular steps, more information can be found at the end of this document :
"Installation"
|
| INFORMATION: |
| |
-
As smart-phones and other Camera technology increase, the generated pictures have now quite big resolution.
So, putting these pictures on line, or sending them by e-mail as they are, will result of very heavy files (which is really not good for your favourite site performance and for networks).
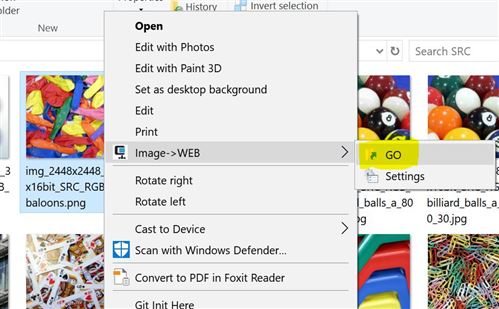
This utility is available as a windows shell extension, it will just add a command in the contextual menu (right click).
Then, you just need to right click to easily resize pictures as copies and share your resized photos on-line with friends.
-
After installation, you will get a new command when "right-clicking" pictures files (jpg, tiff, bmp, png).

-
Just selecting the "GO" command will generate a "resized/reduced" picture in the same directory, then you can use this picture for on-line upload.
-
A new "JPG" image will be generated, then you can use this picture for on-line upload. The name of the generated file will be : old_file_name_{maxWidth}_{Quality}.jpg

|
| Settings Parameters: |
| |
-
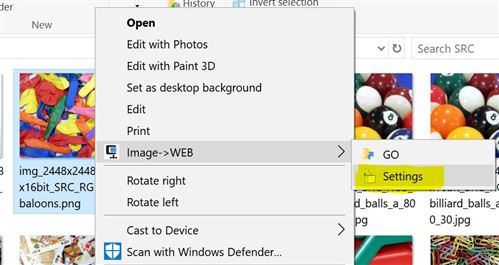
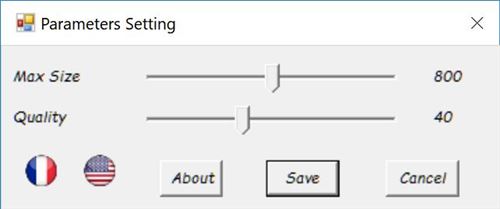
If you select the "Settings" command, a "Settings Box" popup will appears, to allows you to select the maximum size of the generated picture, and the level of compression.
-
MaxSize : Maxumum size for either the Height or the width of the generated picture.
-
Quality : Compression quality (from 10 (low-quality) to 90 (high-quality)).
-
Once saved, the parameters will be applied for all images operation. The parameters are "User Specific" and will be stored in the "Current User default parameters".
|
|
SOURCE CODE:
|
INSTALATION:
-
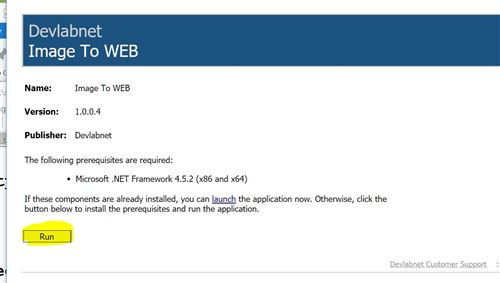
Just go to this page Install Page
Then click on "Run"
At the bottom of your navigator you will see :
Click "Save" (don't run as you will need to have the "Administrator" Rights).

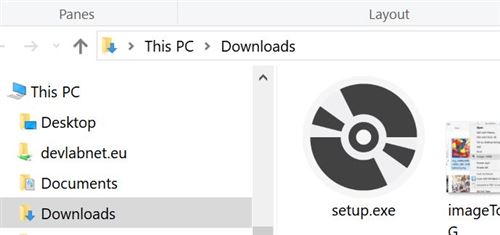
The navigate to the folder you saved the file:

In this folder you will see the downloaded file "setup.exe":
Right click on it, and "run As Administrator":

You'll probably get this pop-up: Just click on "More Info"
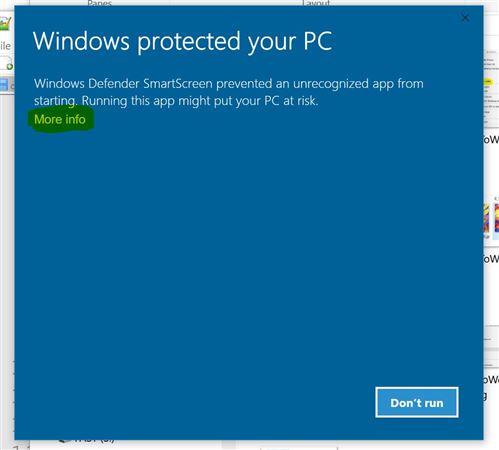
Then here, click on "Run Anyway":

Look at the bottom of your screen, you'll probably see a blinking icon:
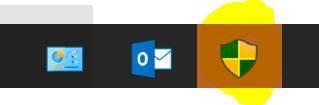
Just click on-it and in the new pop-up: click on "Yes".
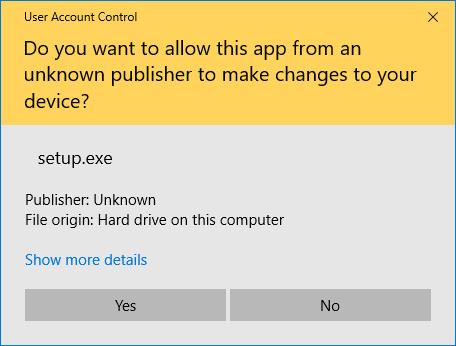
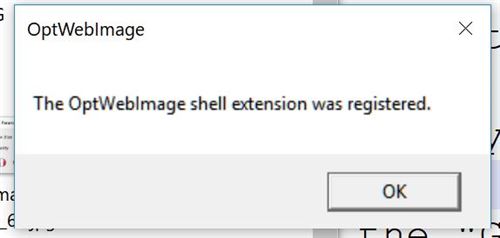
And, Finally you'll get the following pop-up. SO YOU'RE DONE !!
Then Enjoy !!.
|
|
|